|
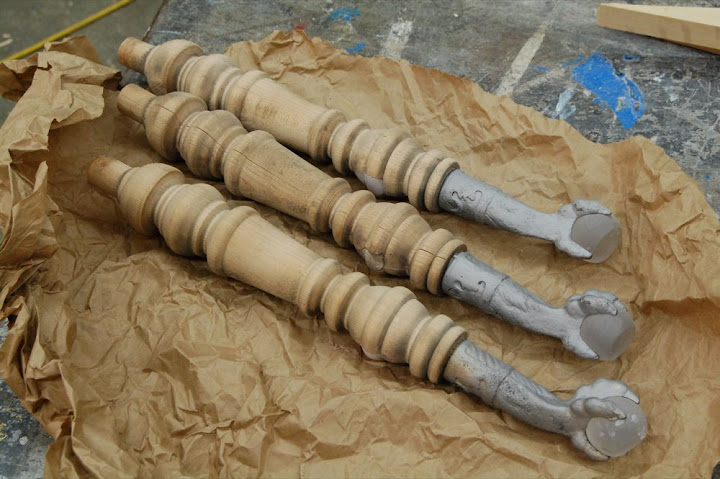
A few years ago my friend Robin gave me three wood & cast iron legs which used to be part of her grandmother's piano stool. Robin said to me: "Yoav, you make great things from found objects, maybe you'll find some use for these legs". A few years passed and Robin and her boyfriend, Chris, got married. So I said to myself, this is a great opportunity to make something out of these legs. It took me more time – much more time than the customary one year grace-period one has to give a wedding gift, but I am after all an artist, and as you all know, an artist's time can be stretched..
The legs wood finish was all ruined; the cast iron ball and claw feet were rusted; the balls themselves were chipped or broken... so I decided to take a drastic measure: to sand-blast them and get rid of many of these inflictions. Then came the question of what to do with the open mortises that used to house the original (and missing) rails, and of course – what am I going to do with the legs? The answer came in the shape of a broken glass lid that embraced a round walnut plate. I found these items on one of the shelves in the Artist-in-Resident space at Purchase.
0 Comments
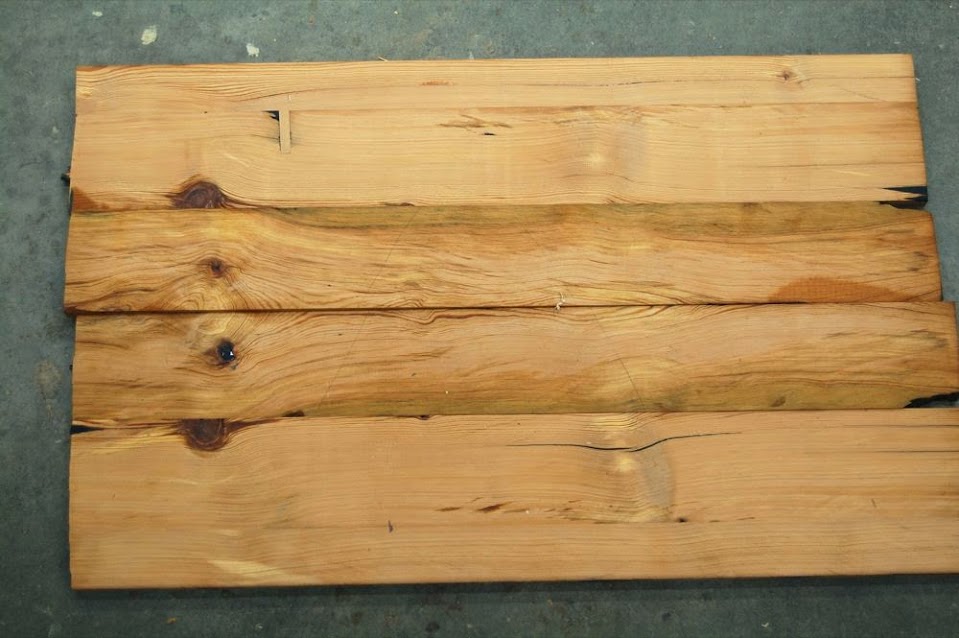
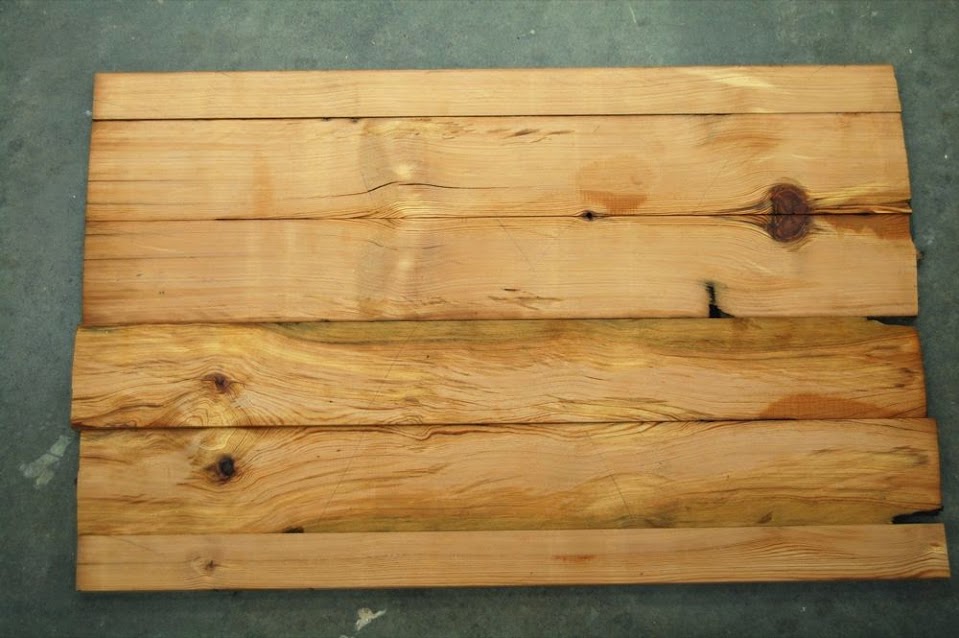
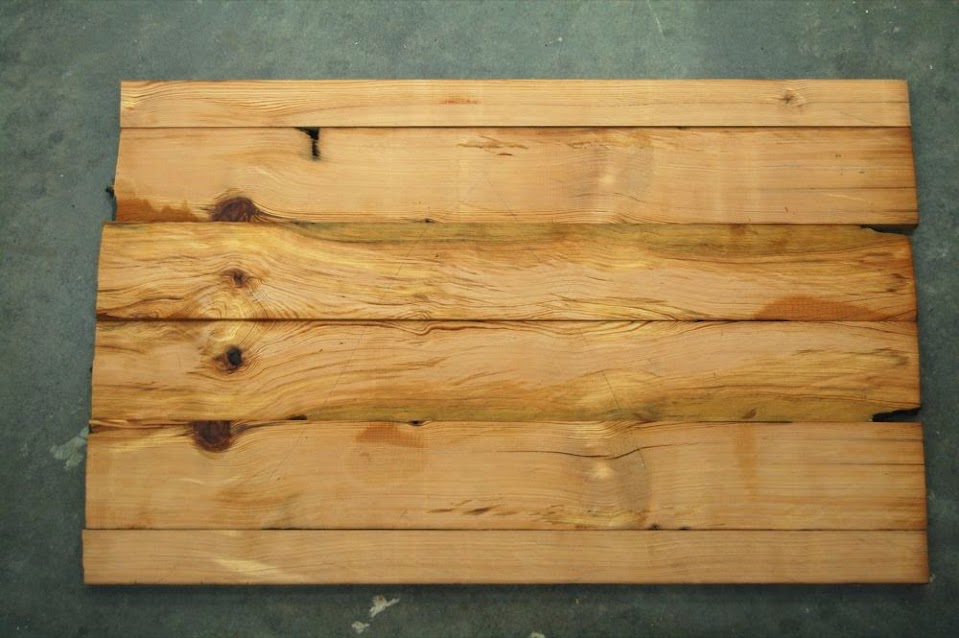
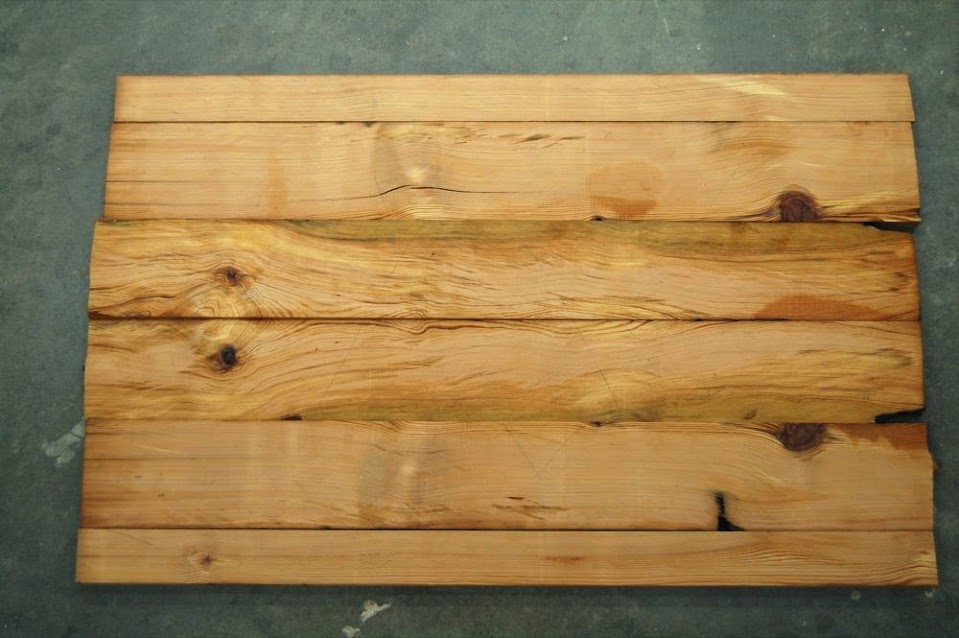
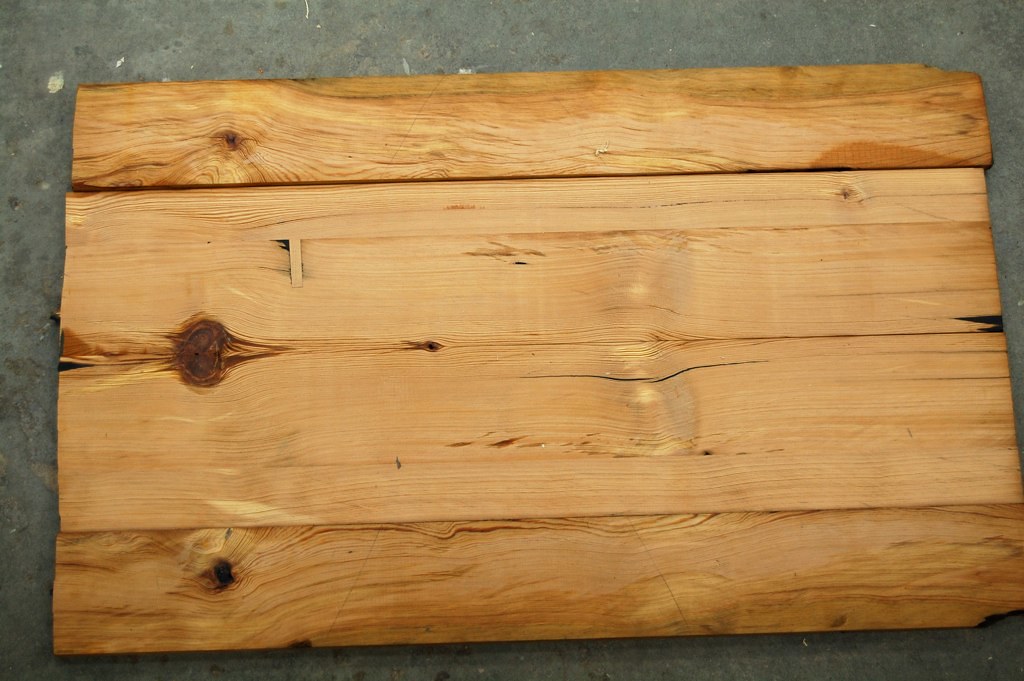
Can Facebook be a design tool?.... well it depends... Recently I needed to decide on the most interesting board orientation for the table top I was building in Purchase College. I had five or six heart-pine boards that I salvaged, and could not make up my mind as to what should be the best way to connect them together in order to make an attractive looking tabletop. So, I decided to bring this up with my facebook friends. I posted three images of the different configurations (I was contemplating with) and ask my fellow facebookers to grade them: form the most attractive to the least attractive. A few of my friends added the reasoning behind their decision, others just cast their ballot. Here are the images:
At the end of the day I took all my friends views into consideration, processed them and made a new (fourth) composition that included book-matching symmetry and which called for all eyes to be placed on one side of the table top.
The third assignment I gave to my students at Purchase, was to design and make a lamp. We had great success here with lamps ranging from artistic and beautiful to enigmatic, humoristic and topsy-turvy. I intend to show you the lamps in a future posting and, by the way, all are made primarily or partially from wood. One of my students, Robert Snyder, made two lamps. One of them was a clever Halloween prank.... but we are not cutting any slack (or corners) here: he used the best wood-joinery possible.... believe me.
And as you can see here, the dovetail construction is very meticulous.
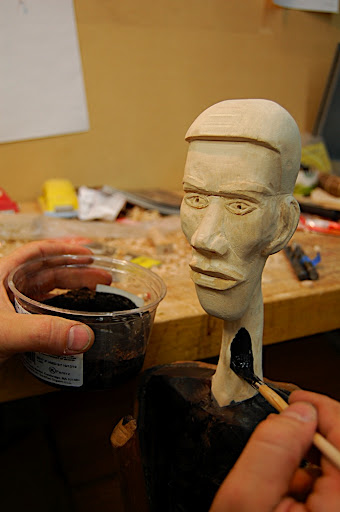
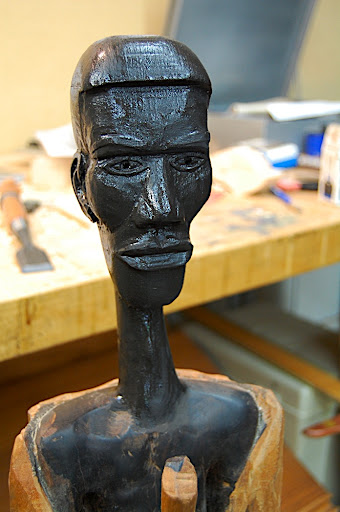
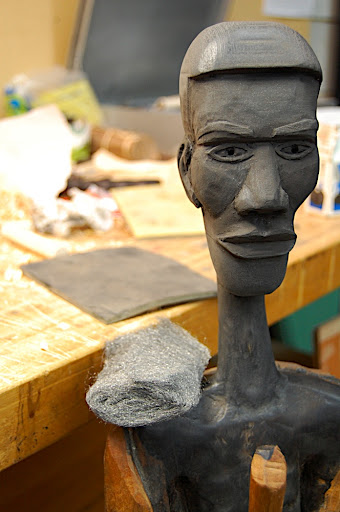
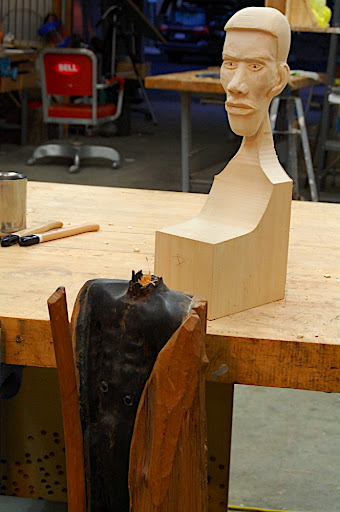
Milk paint is my favorite opaque finish for wood. I buy my milk paint powder form the 'Old fashion milk paint' company. I then mix it myself to the consistency I like; the more water you add the more diluted and "washy" it will be. With a thick layer of milk paint you can completely mask over the grain and the character of your workpiece. Diluting the solution will allow you to see through the paint and notice the grain, etc,. I will talk about milk paint in more details in the future. To blend the basswood with what appeared to be ebony (the original African worrier sculpture) I mixed black milk paint with brown and 'drift wood' color. I painted the head and neck, then waited to it to dry. I put on a second coat and after it completely dried I buffed the surface with steel wool. Lastly applied a coat of Wax.
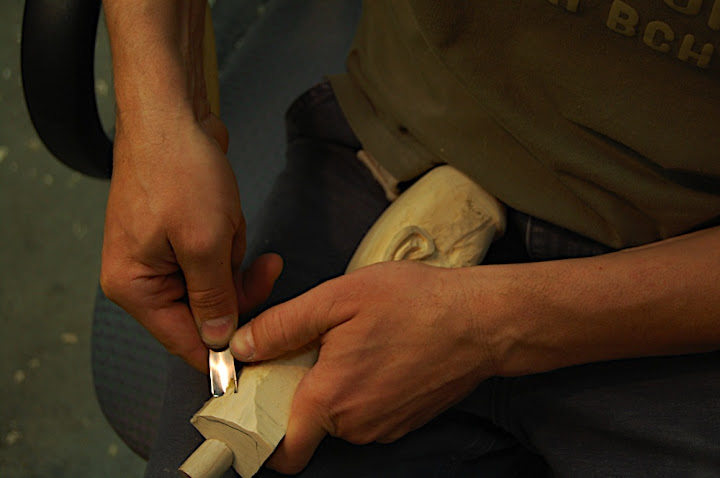
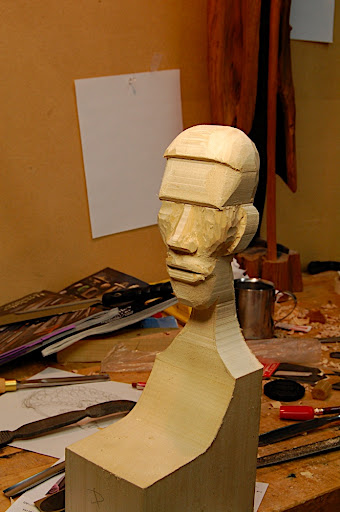
Once the dowel was made and the holes were formed, I whittled down the neck base so it will fit better into the "V" shape socket on the sculpture. I marked the surplus wood black and cut it out with a gouge.
Next, I put glue in the holes and on the dowels, and pressed the parts together.
Lastly I shaped the neck to nicely integrate it with the shoulder area. Next time I will show how I finished the piece using milk paint.
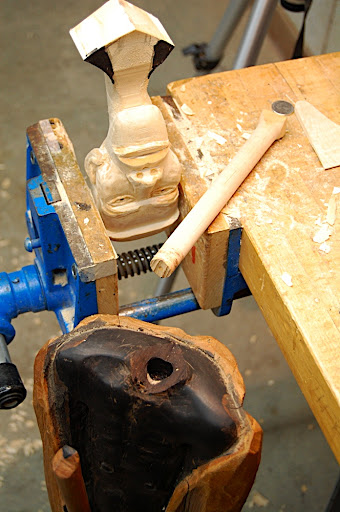
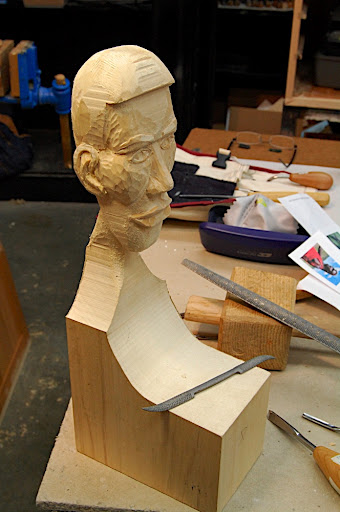
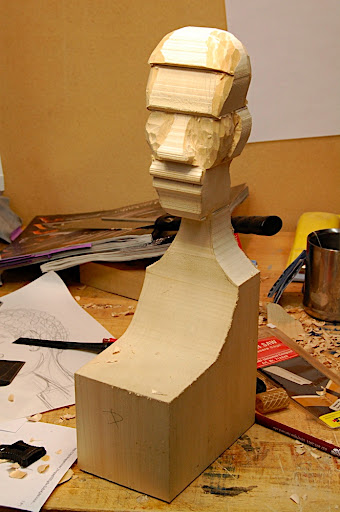
After I finished carving the head I turned to do the more accurate task of shaping and installing the neck to the body.
Firstly I cut the neck base to in the shape of a "V"; this way the transition seam will look less conspicuous than if I had cut if flat, plus, a "V" shape will anchor the neck in a stronger way.
Secondly I cut a complementary "V" shape recess on the neck base – between the shoulders. After this I turned a step dowel on the lathe to serve as a connecting agent between the neck and the body. In situations like these, when you need to drill matching holes in two separate parts and make sure that the holes are in prefect alignment, I do the following: I tap a small brad into one of the parts. With a cut nippers I decapitate the head of the brad to about 1/8" abouve the sarfae. Than I take the other part and set the two together, pressing down on the cut brad. Now I separate the parts and extract the brad. The two remaining puncture holes serve as locus for drilling the holes where the dowel parts will sit in. I made a step-dowel that is narrower in the neck and wider when it is installed in the body of the sculpture.
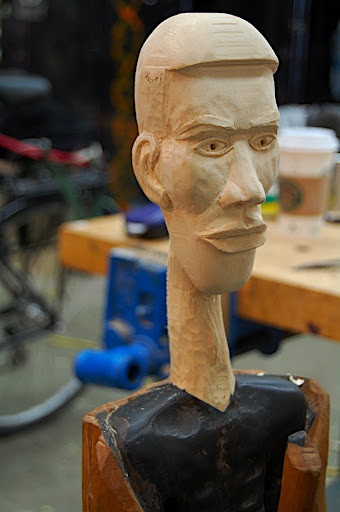
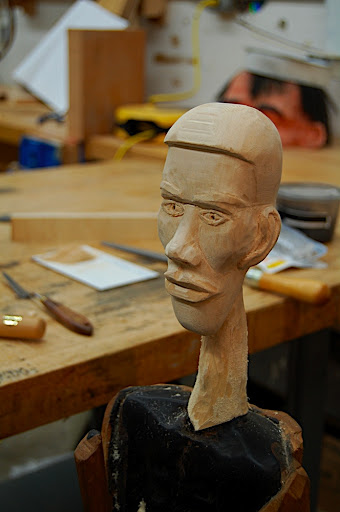
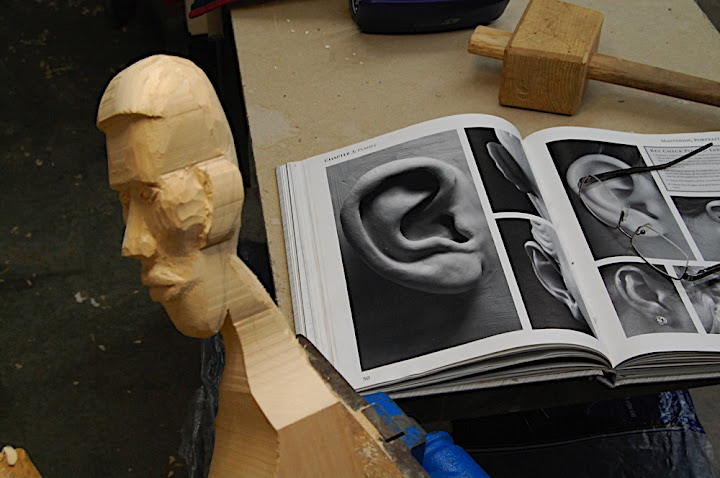
As I started going deeper and deeper into details, I realized that for some details a reference source is really necessary. Carving the ears was such a case where I new I needed detailed images of ears, a book or a real life model. One of our students, Trent – who is a brilliant sculptor, have books on human anatomy. The books contains photographs of clay sculptures: Heads, busts and facial features. This book also explain who to form sculptures in a very good way. Though the medium discussed in the book is clay, the principles layout and displayed there could surly benefit woodcarvers and wood sculptors. Here are the name of the books, written by Philippe & Charisse Faraut 1. Portrait Sculpting: Anatomy & Expression in Clay 2. Mastering Portraiture: Advanced Analyses of the Face Sculpted in Clay For carving the ears I used the second book.
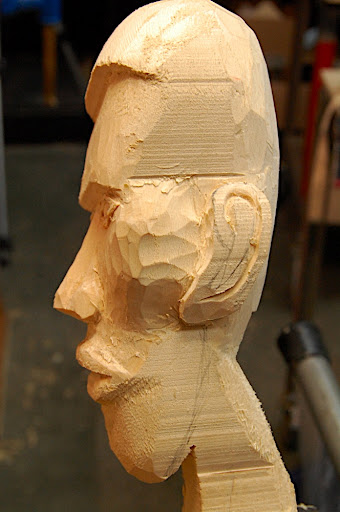
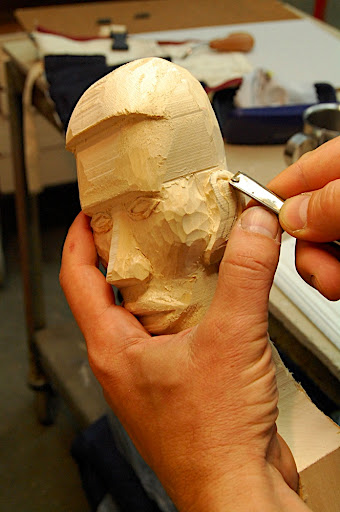
After shaping the head with the band-saw, I started to work the facial details with flat chisels and gouges. Basswood is a fantastic wood for carving: It is soft, homogeneous, and don't have a tendency to tearout. Choosing the right gouge for the job, deciding on the specific technique to reduced a block of wood into a 3D sculpture or decoration, is a very personal approach. I like to do the rough carving with a No 7 or No 5 gouge. I also like to use fishtail gouges (No 3, and 5). Occasionally I will reach-out for a carving knife in order to cut defined lines between two surfaces, or to work in areas where the gouge is just to cumbersome to handle.
In this picture I start carving with a flat chisel. I chamfer the corners and reduce the block.
Outlining the nose is one of the first steps. Notice the gouge marks on the face (No 7 gouge)
Gradually I started to shape the mouth. Next time I will describe the process of going into carving details.
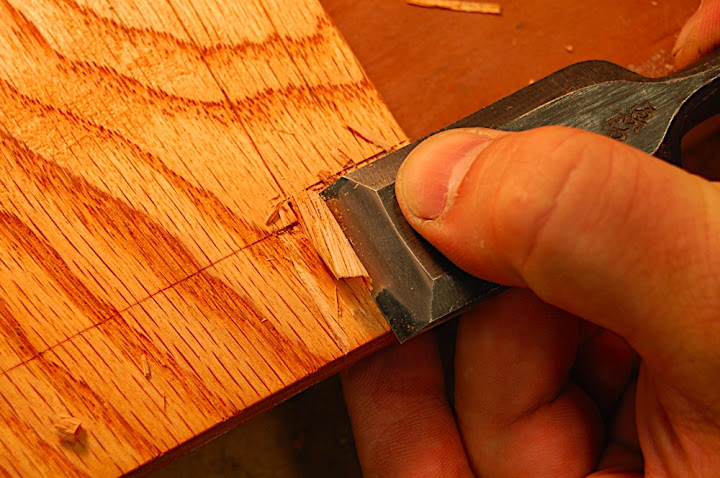
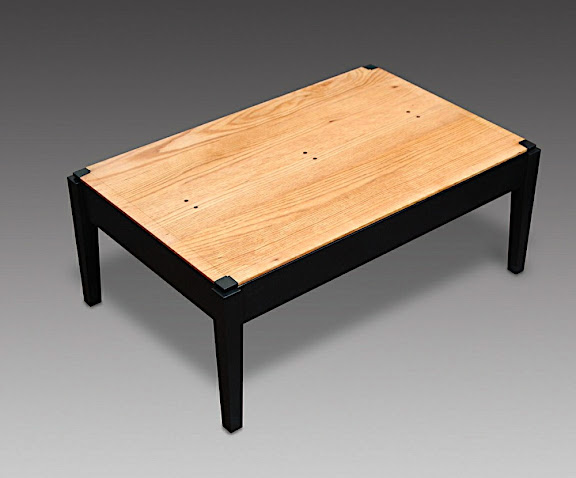
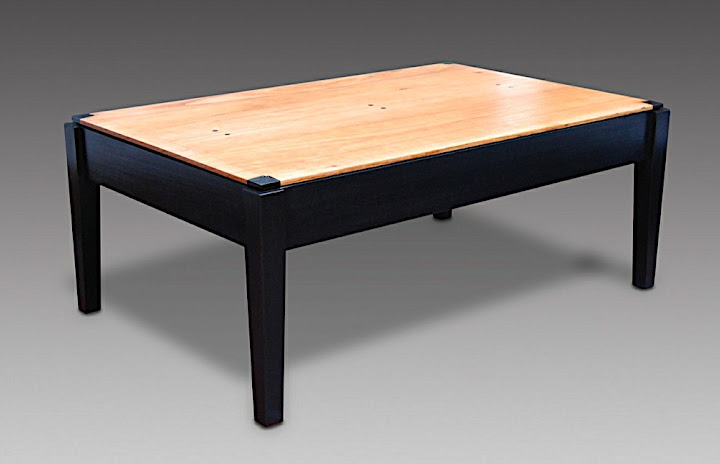
The last part in the coffee table project, was to add a corner detail to emphasize – even farther – the presence of the slanted chamfer. I decided to create an indented square at each corner which will expose the chamfer's angle and thus will make it more conspicuous.
I used a chisel and made the indentation. I then painted the square black-gray (the same color as the table base. One might mistake the black-gray square as the top of the leg, but of course this is just an illusion.
Lie Nielsen's Open House and the making of a table top – part 6: Dealing with eventualities9/19/2010 After the glue, which secure the dowels dried, I planed the dowel and its surrounding surfaces flush. Then I started to rabbet the boards edges to allow them to fit in into the table frame.
I did not want to connect the board to the frame with fasteners; it was not necessary, as I created an internal rabbet (or lip) on all the table apron/rails which will accept the rabbet on the table top.
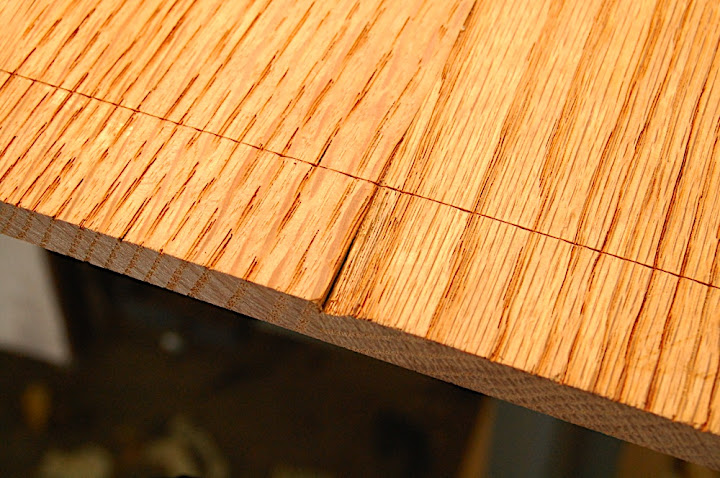
But then alas...!
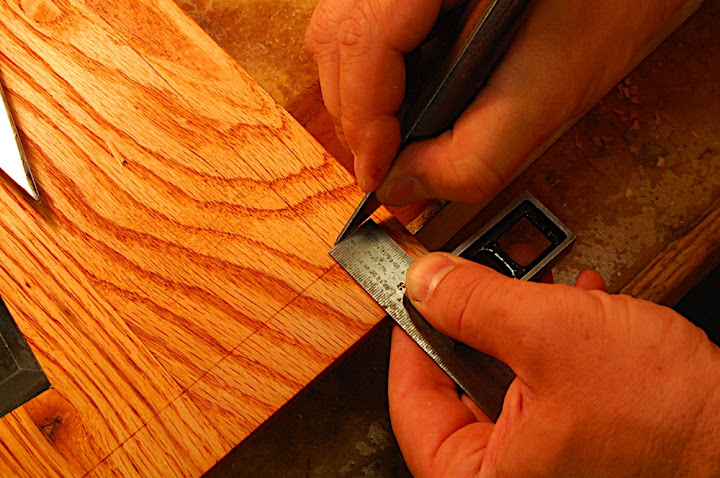
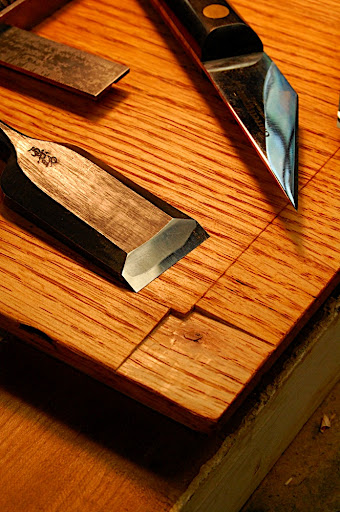
It was a pity but actually not such a bad one. As it happen often: mistakes and accidents can lead to discoveries. In this case, and instead of trying to embark on a restoration mission (fitting a replacement piece of oak and then planing it down) I decided to change the design a bit. I went on to create a slanted chamfer on all edges. I planed the chamfer until the missing wood chip blended in the angled strip. Before starting to plane the chamfer I scored its parameters. I did it for two reasons: to help me know when to stop planing; and to create a defined transition line between the chamfer and the table top.
You see, it would be very difficult to recognize a chamfer of such a subtle slanting angel – as an intended design feature – without the border line. When it is difficult to pinpoint a transition between structures or materials, people tend not to notice it.... or worth: think that the maker made a mistake or neglected to think the design through.
|
AuthorI will share with you my own work, tools, and techniques. I will show how my friends and students build beautiful objects. Sometimes I will talk about wood, forests, sustainability and much more. I am sure it will be interesting Archives
January 2011
Categories
All
|


 RSS Feed
